Regardless of which version you have, the procedure for resetting is the same. Let me show you how.
Without an old remote
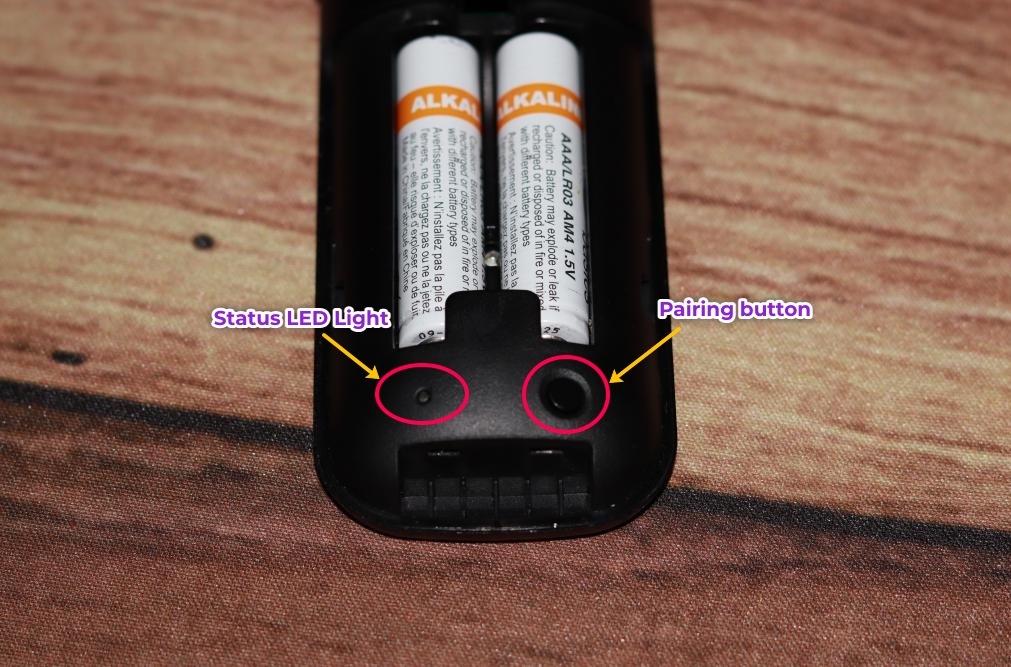
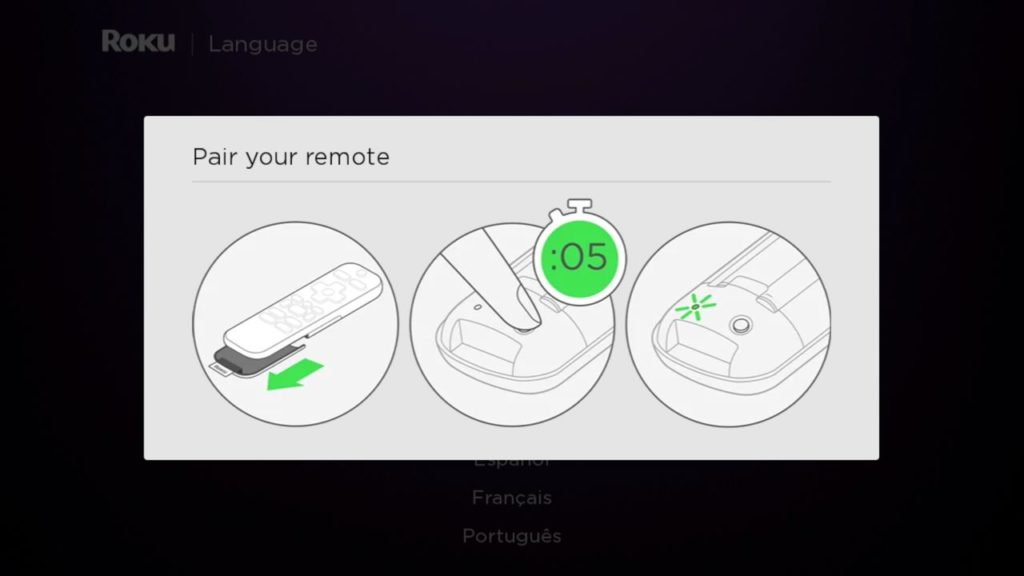
To pair your new remote with your Roku Smart TV or streaming stick without an existing remote, you have to reset it first. To reset your Roku remote, open the battery cover. You’ll see a small circular pairing button. Long press on it for about 5 seconds. The LED Light to the left of the pairing button will start blinking. Make sure your Roku TV or streaming stick is close by. The pairing process will automatically start. You’ll see an animation on your TV within seconds confirming that your remote and your Roku TV are paired. You can now use your Roku remote to navigate around your Roku TV. You can also perform the pairing process during the setup of your Roku device as shown in the following screenshot. Read More:
How to rename Roku TV HDMI InputsHow to use Roku Speech clarity featuresHow to test and fix your Roku TV’s internet connection issuesHow to Update your Roku Smart TV or streaming device
Using Old or Existing remote
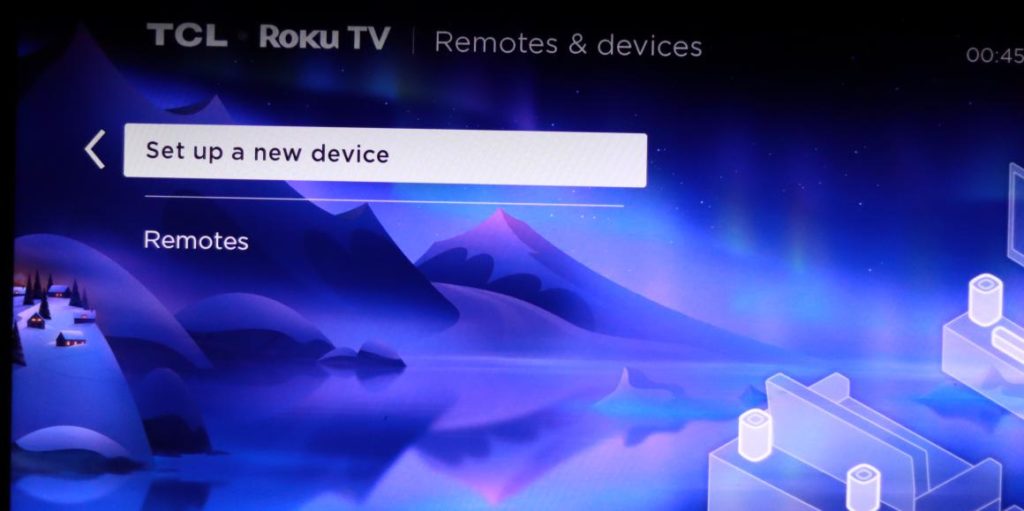
You can also do the pairing with an already set up Roku device. In this case, you can use an existing Roku remote to navigate to Settings or you can use the Roku Mobile App if it was already set that up with your Roku device. With your old or existing remote, press the Home key, then go to Settings on the Roku TV > Remotes & devices > Setup a new device > Remote. Make sure your remote has batteries that are working and then press Continue. Your Roku TV will start searching for your new remote. Set your new remote pairing mode by opening the battery cover and long-pressing the pairing button for about 5 seconds until the status LED light blinks. Your new remote should now be paired with your TV. And that’s basically it! That is how you reset your Roku remote and pair it with your Roku TV or TV stick. Was this helpful? We’d love to hear from you so drop a comment below with your experience.


