Fortunately, the Windows 10 operating system lets you set up to three different clocks on your PC: your primary/local clock and two other clocks in different time zones. In this article, we will show you how to set up multiple clocks on your computer.
Adding Multiple Clocks
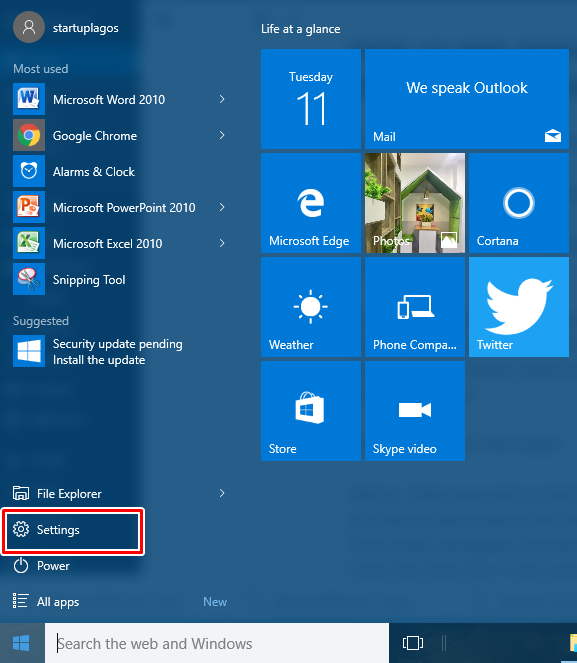
- First, click the start icon on your home screen, and then click ‘Settings’.
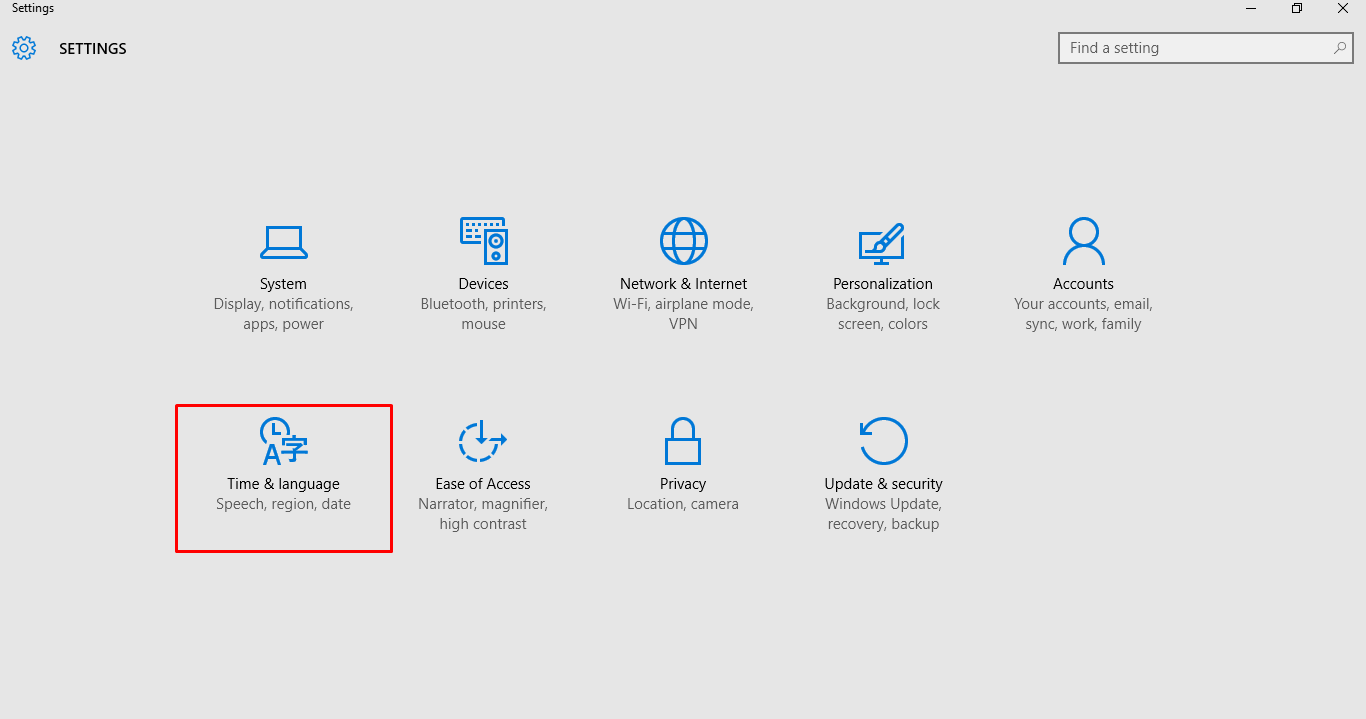
- Once the settings page is displayed, select ‘Time & language’.
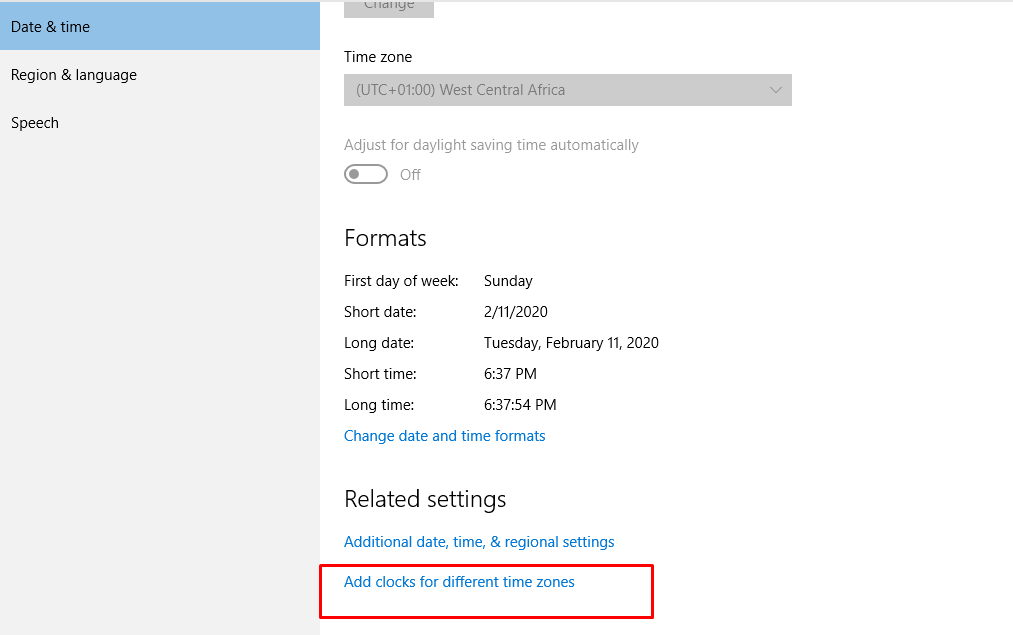
- At the bottom of the Time & language page, click ‘Add clocks for different time zones’.
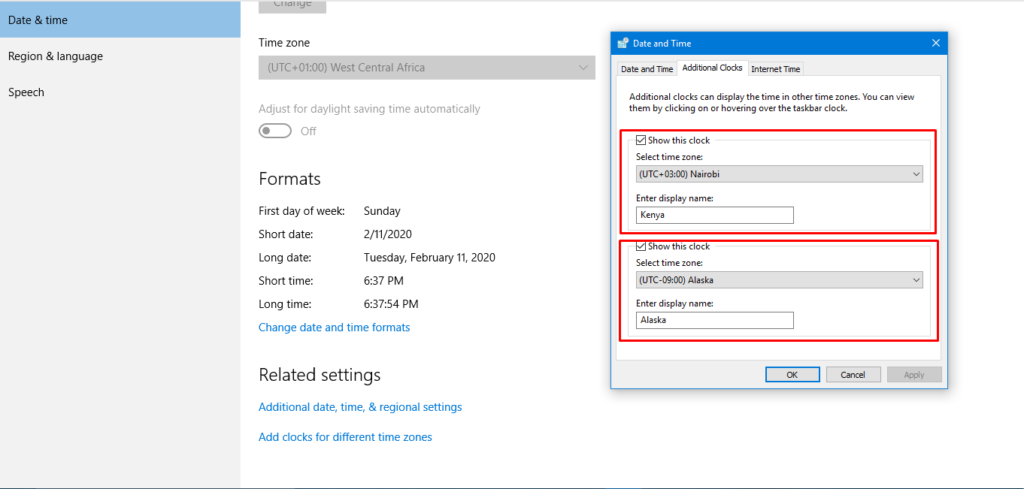
- Once the ‘Additional clock’ tab opens, click the checkbox ‘Show this clock’ for both clock options. Then go ahead and select your preferred time zone. Also, make sure you add the display name for each clock – it’s best you use the name of the city or country.
- When you’re done, click ‘Apply’ That’s it. When you need to check the time for the different zones you set, just click on time & date in the bottom-right corner of the taskbar, and all three clocks will appear; the main clock (your local time zone), and the clocks that show time in the zones you set. Related Article: How to Set Default Apps in Windows 10
How to Add More Clocks (Alarm & Clock app)
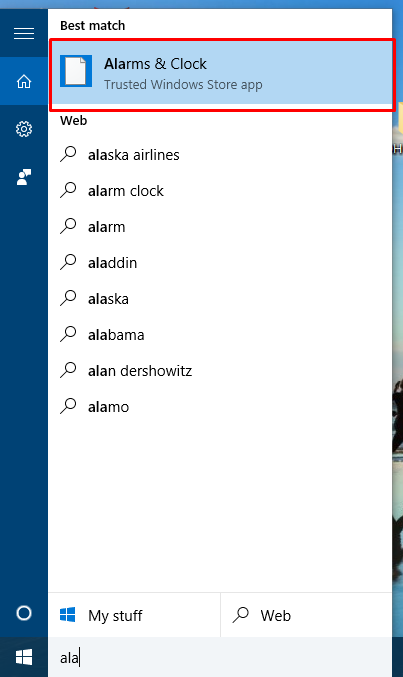
- Click the start icon, then search for the ‘Alarm & clock’ app and click on the ‘Clock’ section.
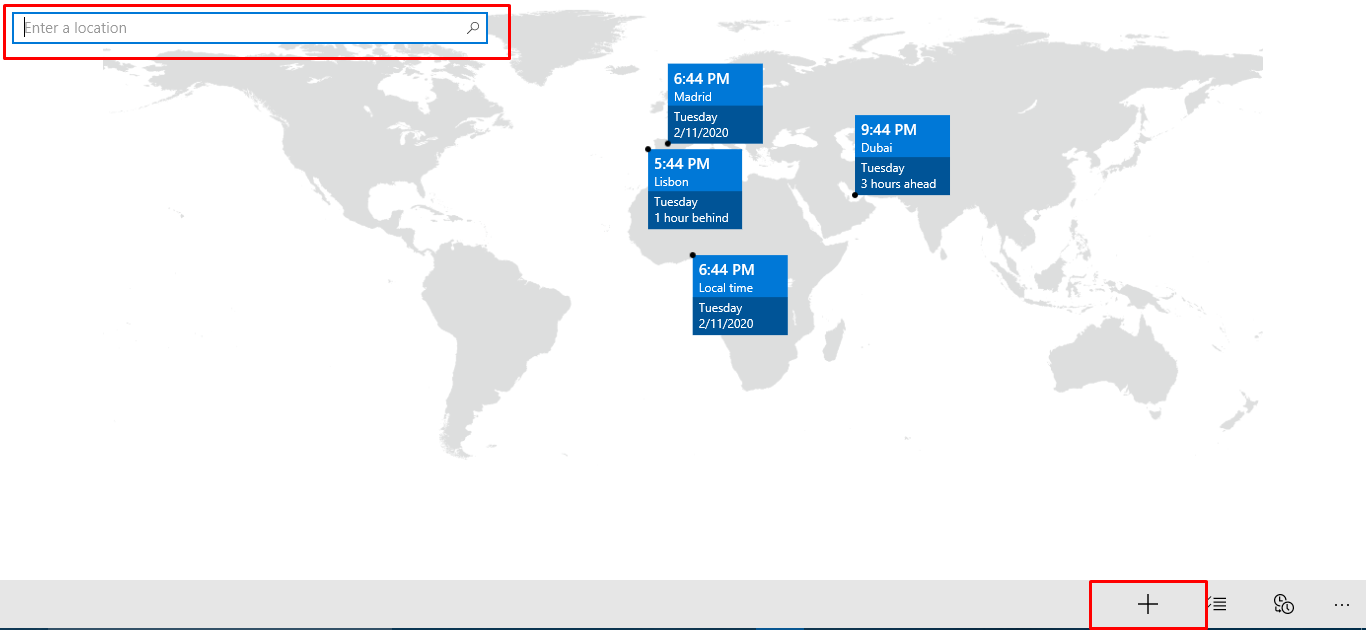
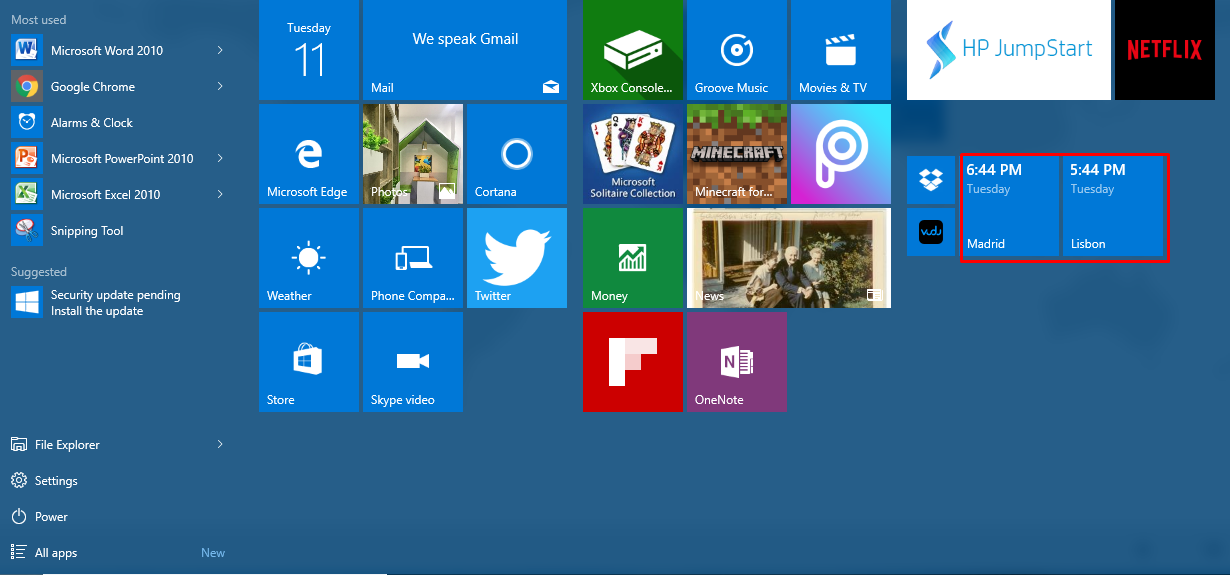
- At the bottom-right, click the ’+’ button, and a search box will be displayed on the top-left. Type in the location you want to see. For easy accessibility, immediately you create a new time zone clock, right-click the time zone in the map and select ‘Pin to Start’. This means you can view your multiple time zones whenever you click the start icon on your home page. Related Article: How to split your screen on a Windows 10 PC The number of timezones you want to keep track of would determine which feature to use. Windows allows you to configure up to three different clocks to the taskbar, but if you need to keep track of even more time zones, the ‘Alarms & Clock’ app lets you do this.
